
Maybe you read the manuals cover-to-cover including safety warnings and legal disclosures before you power up the new gizmo. Maybe you spend all day trying every possible option before reluctantly opening the documentation. Regardless, if you are a first time owner of a Digirig Mobile unit – this post is for you.
If at any point in the process your results differ from what is described here, please refer to the Troubleshooting Guide for possible remedies.
Under the Hood
Inside your Digirig Mobile there is a USB hub with two downlink devices: a sound card based on a popular CM108 chip and a serial port bridge based on CP2102 chip. There is also the circuitry for hardware PTT switching, serial port level conversion, filtering and signal attenuation. For a complete technical overview including the configuration options and schematic, please refer to this post.
Computer Connection
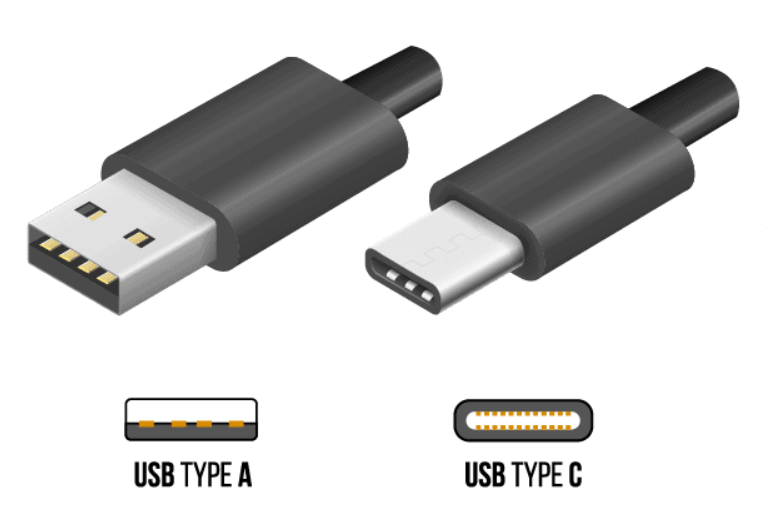
Digirig is connected to the computer with a single cable plugged into the Type-C socket labeled “USB”. This connection is used for both communication and for powering the device. On the other end of the cable there can be any standard USB connector matching the computer’s socket. Typically it’s a USB-A connector or in case of newer computers, tablets or phones it can be a type C connector.
Digirig can be connected to any USB host device such as Windows computers, MacOS computers, Linux machines including Raspberry Pi boards as well as Android devices.
Detecting Components
Before connecting your Digirig to the transceiver, first connect it to the computer. Using the Device Manager or equivalent utility in the OS of your choosing, confirm that the system has detected Digirig’s sound card and the serial port bridge. The devices will be found under “Sound, video and game controllers” and “Ports (COM & LPT)” with names “USB audio device” or “USB PnP Sound Device” and “Silicon Labs CP210x USB to UART Bridge (COMx)” respectively.

Take note of the COM port number. You will need it later.
If the device manager shows serial port entry with an exclamation mark and no COM number assigned then a driver installation is required. The process is shown in this video.
Setting up Sound Devices
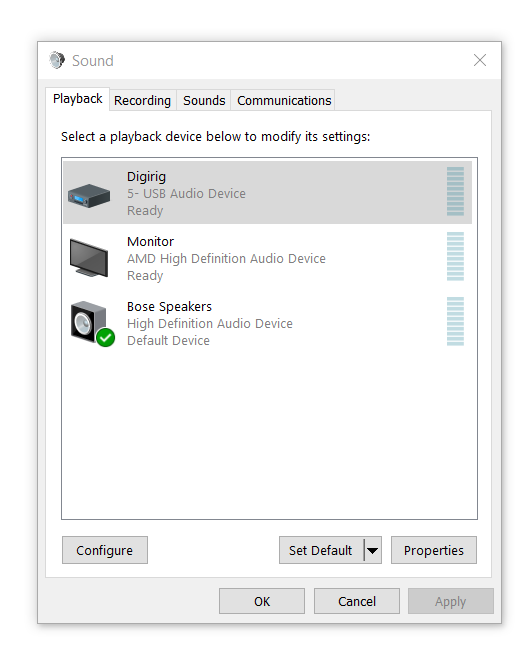
Open Control Panel or equivalent utility to locate playback and recording components of the Digirig’s sound card. They will be listed as “USB audio device” or “USB PnP Sound Device”.
Windows assigns recently added sound card as a Default Device and Default Communication Device. This designation should be moved from Digirig back to the computer’s regular microphone and speakers so the unrelated audio doesn’t end up on the air.
Inspect the properties of Digirig’s playback and recording devices renaming them to “Digirig” so they can later be easily recognized in the lists inside of the digital modes apps. You can also change the default icon to modem. Inside the level tabs set initial values at 20-50% and disable any custom features (AGC, Spatial sound etc.).
Audio level adjustments are covered in more details in this post and this video.
In Windows 11 edit system’s privacy settings to allow applications access to Digirig’s recording device (Microphone).
Transceiver Connections
On the transceiver side Digirig has 3.5mm TRRS sockets labeled “audio” and “serial”. Audio socket connects ground, audio input, audio output and hardware PTT line. These are the minimum required signals for the digital modes. All transceivers will use this connection for digital modes. Serial socket is used for optional CAT control with the transceivers supporting this functionality. Serial port can also be used for firmware, presets or channels programming.
Store cables always use the straight TRRS connector on the Digirig side. Please refer to the product page of the cables you purchased for additional information including the purpose, the transceiver sockets involved and required serial port configuration.
Serial Port Configuration
If using the serial socket, the Digirig has to be configured for a specific electrical levels of the serial port matching the expectations of your transceiver. The interface can be ordered pre-configured for specific transceiver. The configuration can be later changed using the solder switches, but this is not something that is done operationally. If you operate multiple Digirig devices in different configurations, make sure to label them to avoid any confusion.
Serial port configurations only matter with the transceivers utilizing the serial CAT control. Digirig in any configuration can be used with basic radios that do not support CAT control or transceivers that do not have serial cable connected.
For more information on serial port configuration please refer to additional resources: [1][2].
Software Setup – General
Because you authorize your computer to transmit on the air on your behalf, all of the digital modes apps will ask you for your call sign as minimum. There may be other settings not directly related to Digirig. The general rule of thumb is that you leave them at defaults unless you know exactly what they do.
Software Setup – Audio
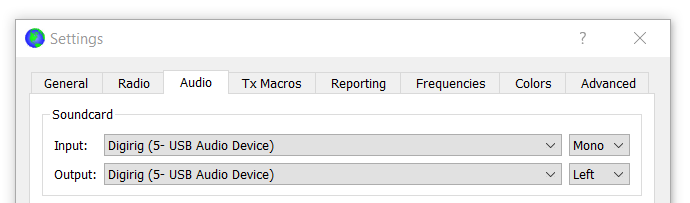
Digirig itself doesn’t implement any digital modes or TNC functionality, it acts a conduit between your digital computer and your analog transceiver. The magic happens in the software you run. Every digital modes app will have a configuration form for setting up the audio. Select Digirig’s playback and recording devices from the drop down lists for audio in and audio out. If you renamed them in the Control Panel it will be easy to distinguish them by the “Digirig” label, otherwise look for devices with description containing “USB audio device” or “USB PnP Sound Device”. If there is a channel selector, choose “Left” or “Mono”.
Refer to your transceiver’s user manual, community forum or online tutorials to find the related transceiver settings. This may involve switching audio inputs and outputs to accessory port, adjusting signal levels, AGC, ALC, filters etc. If Digirig is connected to the radio’s speaker port (as in case of HTs), you will need to open the squelch and adjust the audio level with the volume knob. For additional information on setting up and troubleshooting audio settings please watch this video.
Correctly configured audio settings should result in your software decoding incoming traffic regardless of other aspects of the setup.
Software Setup – PTT
Digirig Mobile offers a hardware PTT switch controlled by the RTS signal of its serial port. Alternatively, transceivers supporting serial control interface can use CAT commands for keying up the radio.
In the digital modes software look for the configuration screen pertaining to PTT settings. There, choose the PTT by RTS option, selecting Digirig’s COM port as the source of the signal. This port selection is separate from rig control configuration. In some software packages you may need to install an additional PTT module to enable this option.

To prevent unexpected transmission, disable any serial port’s settings related to hardware flow control or handshake. This includes any non-PTT related options mentioning RTS, CTS, DTR signals.

With the audio and hardware configured correctly you should be able to operate digital modes regardless of serial CAT control availability. Without the optional CAT control you will have to manually tune your radio to the target frequency and set modulation, filters etc.
For additional information on setting up and troubleshooting Digirig’s PTT functionality please watch this video.
Software Setup – CAT
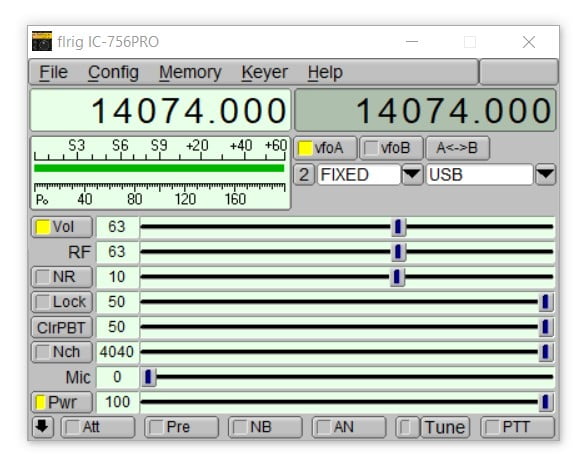
If your transceiver supports CAT functionality and it is connected to Digirig’s serial port, you can configure the optional rig control. This will let your software sync the frequency, band selection as well as control other settings in your radio from the computer. Typically this involves selecting a matching rig profile from the drop down list and configuring serial port parameters. The port parameters must match between the transceiver settings and the software configuration. Refer to the user manual, community forum or online tutorials for the information on correct settings for your radio.
With many software packages it is possible to use an intermediary software for CAT control. This moves the port configuration to that middleware software and the digital modes app refers to the software name in the transceiver profile list. Read this post to learn more about this option.
Fine Tuning
With things working in principle you can now focus on fine adjustments of the audio levels, logging features etc. Watch out for the mode-specific gatchas such as the accurate computer time requirement for FT8 etc.
Additional Resources
Please refer to the Troubleshooting Guide for simple steps to diagnose and resolve most common issues. Take notes of the things you tried and results you got. This information will streamline the process if you decide to seek further help.
For transceiver specific and app specific settings check out the community forums, browse the forum tags to quickly narrow down to the most relevant posts. Ask a question or help another operator if you know the answer. Refer to the transceiver manual for information on menu settings, connections etc.
If searching for online tutorials, you can look for general resources dedicated to your transceiver model and target digital mode without narrowing down to Digirig specific information. Most of the settings will be the same, just keep in mind that competing interfaces may not support serial CAT control or use different PTT method.
Welcome to the digital modes! Thank you for choosing Digirig.